slides
Slides
Slides in your terminal.
Installation
![]()
![]()

Instructions
MacOS
brew install slides
Arch
yay -S slides
Nixpkgs (unstable)
nix-env -iA nixpkgs.slides
Any Linux Distro running snapd
sudo snap install slides
Go
go install github.com/maaslalani/slides@latest
From source:
git clone https://github.com/maaslalani/slides.git
cd slides
go install
You can also download a binary from the releases page.
Usage
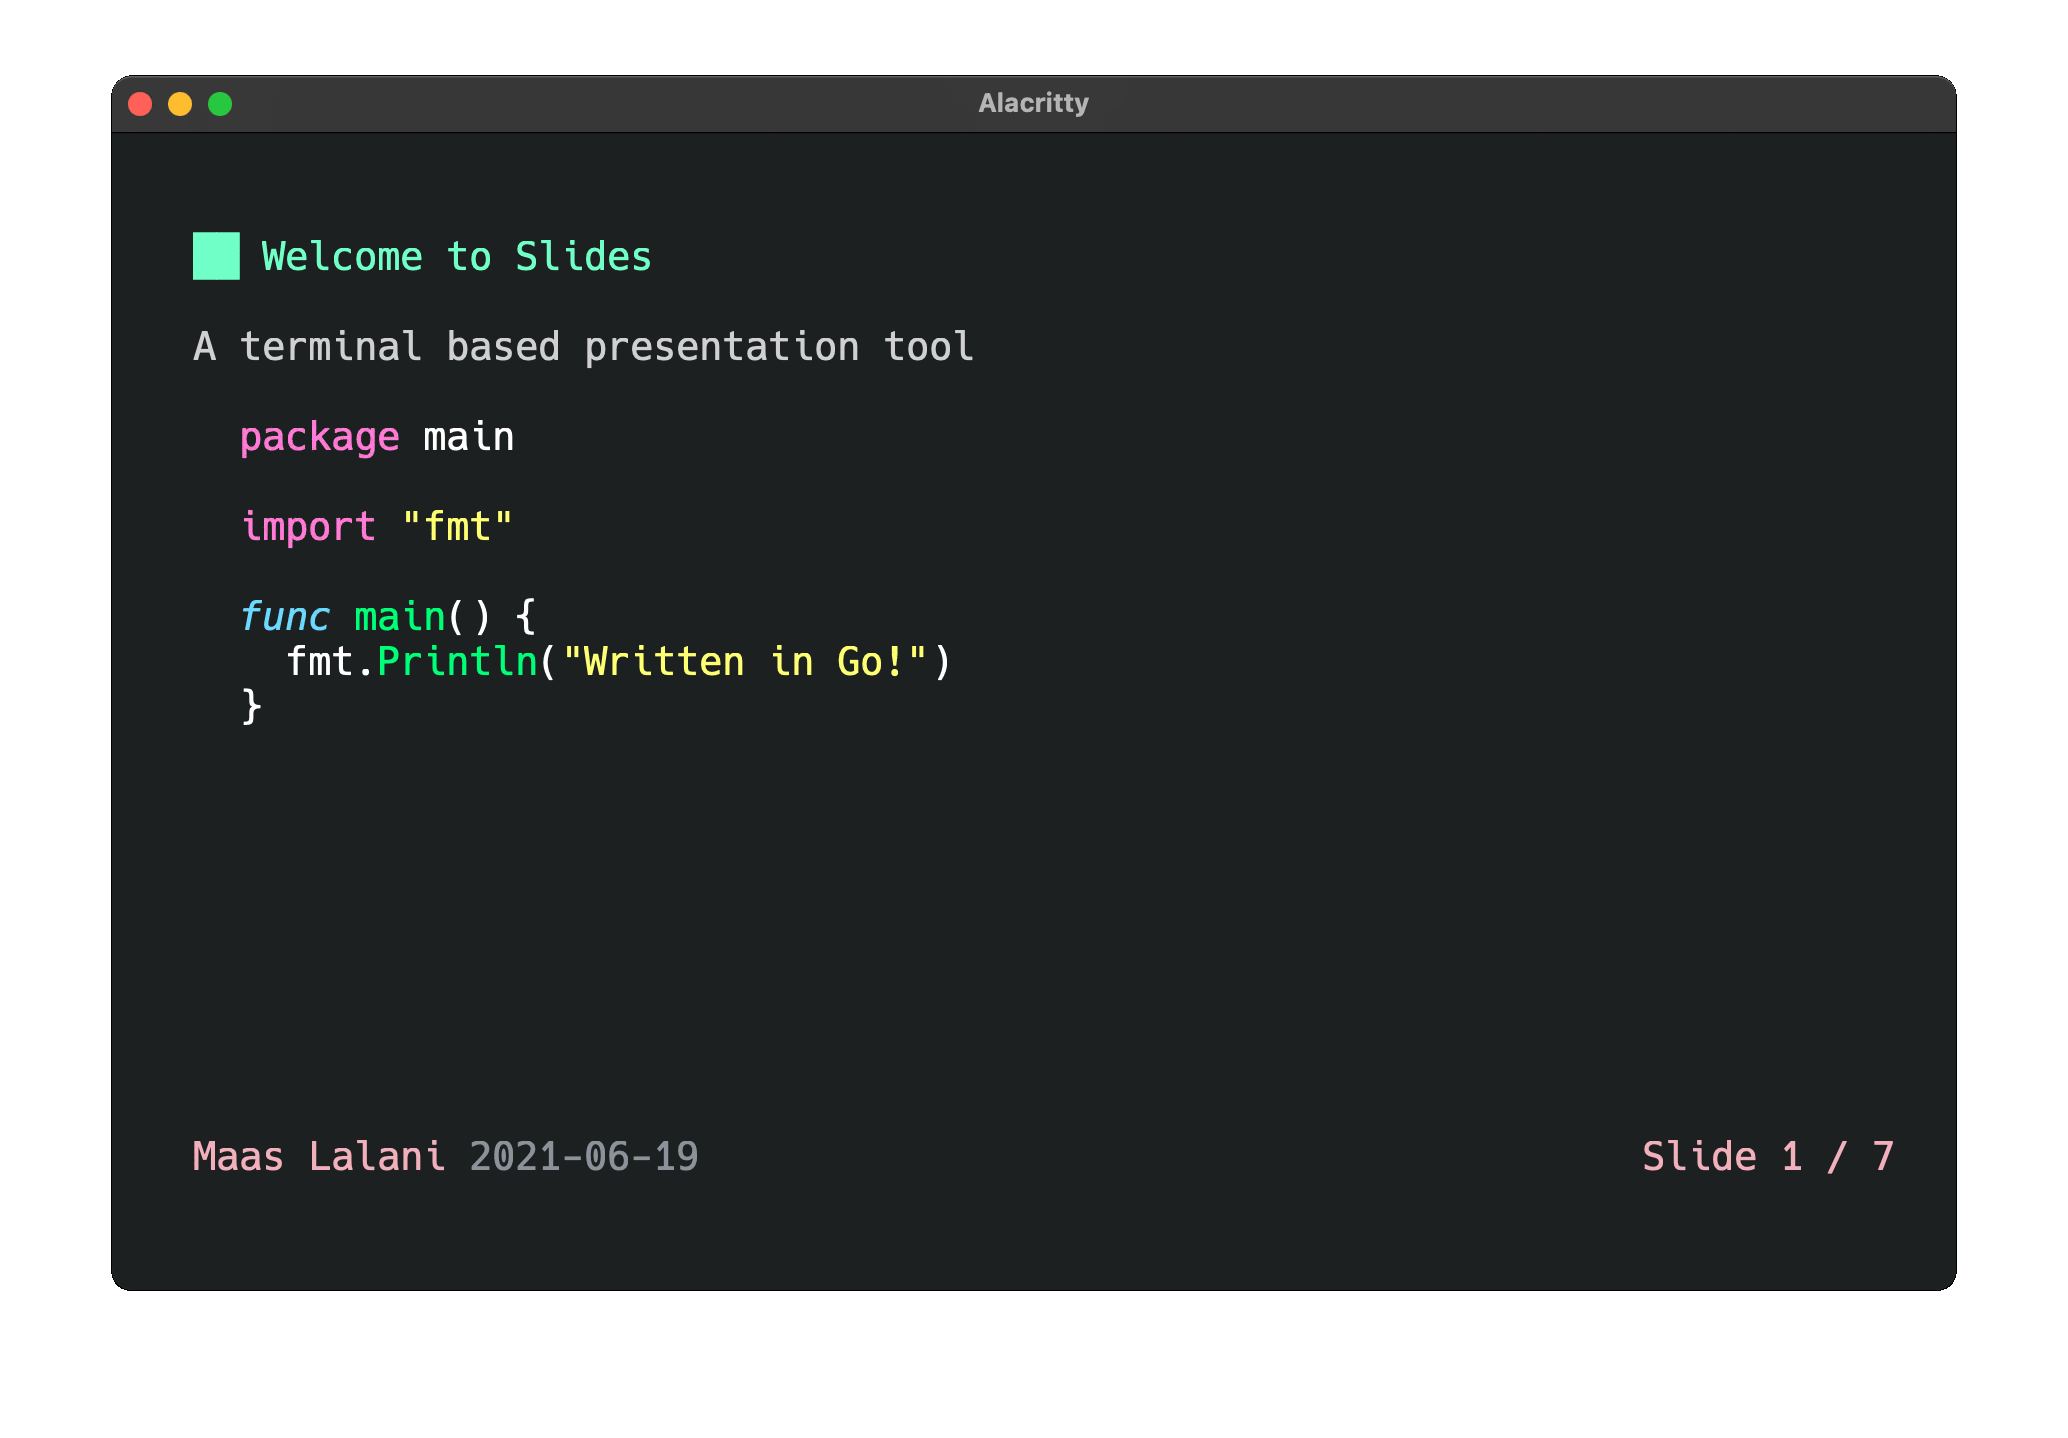
Create a simple markdown file that contains your slides:
# Welcome to Slides
A terminal based presentation tool

---

## Everything is markdown
In fact, this entire presentation is a markdown file.

---

## Everything happens in your terminal
Create slides and present them without ever leaving your terminal.

---

## Code execution
```go
package main

import "fmt"

func main() {
  fmt.Println("Execute code directly inside the slides")
}
```

You can execute code inside your slides by pressing `<C-e>`,
the output of your command will be displayed at the end of the current slide.

---

## Pre-process slides

You can add a code block with three tildes (`~`) and write a command to run *before* displaying
the slides, the text inside the code block will be passed as `stdin` to the command
and the code block will be replaced with the `stdout` of the command.

```
~~~graph-easy --as=boxart
[ A ] - to -> [ B ]
~~~
```

The above will be pre-processed to look like:

┌───┐  to   ┌───┐
│ A │ ────> │ B │
└───┘       └───┘

For security reasons, you must pass a file that has execution permissions
for the slides to be pre-processed. You can use `chmod` to add these permissions.

```bash
chmod +x file.md
```
Checkout the example slides.
Then, to present, run:
slides presentation.md
If given a file name, slides will automatically look for changes in the file and update the presentation live.
slides also accepts input through stdin:
curl http://example.com/slides.md | slides
Go to the first slide with the following key sequence:
- g g
Go to the next slide with any of the following key sequences:
- space
- right
- down
- enter
- n
- j
- l
- Page Down
- number + any of the above (go forward n slides)
Go to the previous slide with any of the following key sequences:
- left
- up
- p
- h
- k
- N
- Page Up
- number + any of the above (go back n slides)
Go to a specific slide with the following key sequence:
- number + G
Go to the last slide with the following key:
- G
Search
To quickly jump to the right slide, you can use the search function.
Press /, enter your search term and press Enter
(The search term is interpreted as a regular expression. The /i flag causes case-insensitivity.).
Press ctrl+n after a search to go to the next search result.
Code Execution
If slides finds a code block on the current slides it can execute the code block and display the result as virtual text on the screen.
Press ctrl+e on a slide with a code block to execute it and display the result.
Pre-processing
You can add a code block with three tildes (~) and write a command to run
before displaying the slides, the text inside the code block will be passed
as stdin to the command and the code block will be replaced with the stdout
of the command. Wrap the pre-processed block in three backticks to keep
proper formatting and new lines.
```
~~~graph-easy --as=boxart
[ A ] - to -> [ B ]
~~~
```
The above will be pre-processed to look like:
┌───┐  to   ┌───┐
│ A │ ────> │ B │
└───┘       └───┘
For security reasons, you must pass a file that has execution permissions
for the slides to be pre-processed. You can use chmod to add these permissions.
chmod +x file.md
Configuration
slides allows you to customize your presentation’s look and feel with metadata at the top of your slides.md.
This section is entirely optional,
slideswill use sensible defaults if this section or any field in the section is omitted.
---
theme: ./path/to/theme.json
author: Gopher
date: MMMM dd, YYYY
paging: Slide %d / %d
---
theme: Path tojsonfile containing a glamour theme, can also be a link to a remotejsonfile which slides will fetch before presenting.author: Astringto display on the bottom-left corner of the presentation view. Defaults to the OS current user’s full name. Can be empty to hide the author.date: Astringthat is used to format today’s date in theYYYY-MM-DDformat. If the date is not a valid format, the string will be displayed. Defaults toYYYY-MM-DD.paging: Astringthat contains 0 or more%ddirectives. The first%dwill be replaced with the current slide number and the second%dwill be replaced with the total slides count. Defaults toSlide %d / %d. You will need to surround the paging value with quotes if it starts with%.
Date format
Given the date January 02, 2006:
| Value | Translates to |
|---|---|
YYYY |
2006 |
YY |
06 |
MMMM |
January |
MMM |
Jan |
MM |
01 |
mm |
1 |
DD |
02 |
dd |
2 |
SSH
Slides is accessible over ssh if hosted on a machine through the slides
serve [file] command.
On a machine, run:
slides
serve [file]
Then, on another machine (or same machine), ssh into the port specified by
the slides serve [file] command:
ssh 127.0.0.1 -p 53531
You will be able to access the presentation hosted over SSH! You can use this
to present with slides from a computer that doesn’t have slides installed,
but does have ssh. Or, let your viewers have access to the slides on their
own computer without needing to download slides and the presentation file.
Alternatives
Credits: This project was heavily inspired by lookatme.
Development
See the development documentation